
Discord is a cross-platform application for audio and video calls, text messaging, media, and file sharing. It was originally developed for the gaming community but nowadays it gained popularity and people from different interests also use Discord.
Windows is said to be a user friendly OS and does not require much knowledge to install this bu the difficult part is installing Discord on Linux. So, in this article, we are showing you step-by-step, how to install Discord on Ubuntu.
Discord in Ubuntu or in general provides a collection of persistent chat rooms and voice chat channels are called servers. These servers are organized in topic-based channels where anyone can collaborate, share, and talk in person or group chat.
Features of Discord application
A few significant features of the Discord application are given below.
- You can easily create and manage private and public communities
- Video and screen share options
- Reduced motion settings
- Custom status
- Go live and share screen
- Spellcheck feature
- Easy keyboard navigation
How to install the Discord Ubuntu Variant?
Discord for Ubuntu is available via different ways. Below are the 3 ways, using which you can download and install the Discord on Ubuntu Linux.
- Download and install it using the .deb package
- Install Discord via snap
- Discord install using .tar.gz file
Method 1: Install via Ubuntu Discord .deb package
You can visit the download page on the official website of Discrd to download the .deb file.
OR
Execute the given command in your terminal to download it –
wget -O ~/discord.deb "https://discordapp.com/api/download?platform=linux&format=deb"
Once the .deb file gets downloaded open it with a software manager and clicks on install.
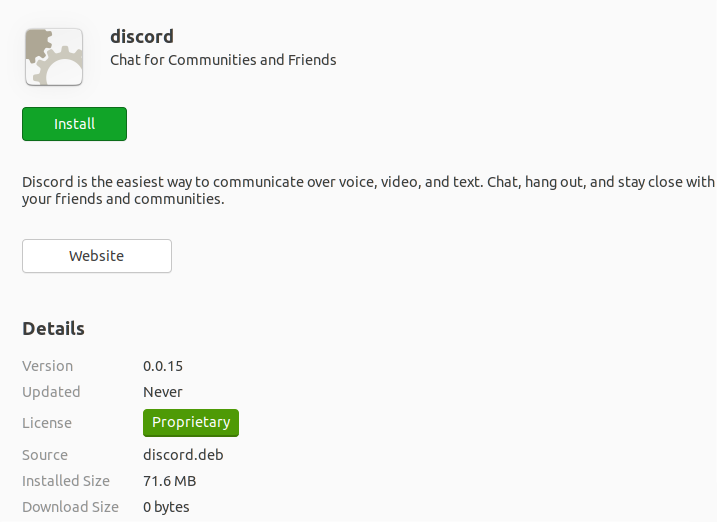
Enter the user’s password if it prompts you. The application will now get installed you can launch it from the activities dashboard by searching discord.

Click on the icon to launch the application.
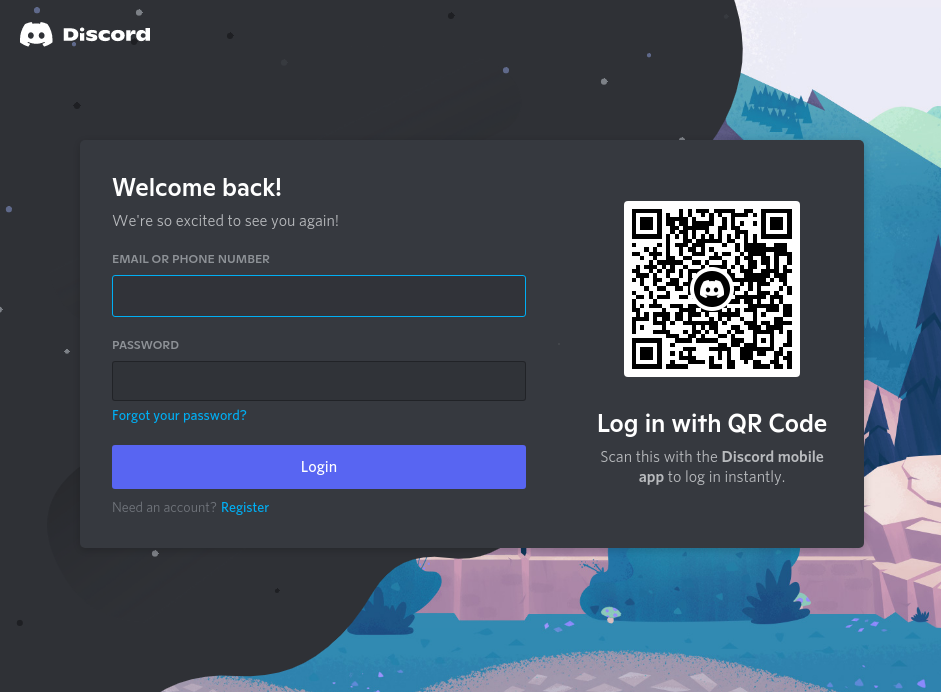
Next, it will ask you for your login credentials of Discord if you have, then enter it and click on login otherwise register yourself on this application and then log in to use this application.
Method 2: Install Discord Ubuntu via a snap
In Ubuntu, you can install Discord using the snap package. If you have snap enabled on your system the use the given command to install Discord on your system.
sudo snap install discord

Once it gets installed you can again launch and use it from the activity dashboard.
If you want to uninstall it from your system you can use the given command –
sudo snap remove discord
Installing from this method has the advantage that you always will have an updated version of the Discord application.
Method 3: Install Discord on Ubuntu using .tar.gz file
From the download page on the official website of Discord download the .tar.gz file.
Use the given command to extract the downloaded file to /opt directory.
sudo tar -xvzf discord-0.0.15.tar.gz -C /opt
The version of the discord application may vary so make sure to use the current version in the above command to avoid any errors.
Now, you should create a symbolic link to the Discord binary file in /usr/bin directory.
sudo ln -sf /opt/Discord/Discord /usr/bin/Discord
Now any user can run the discord command from anywhere in the system.
Next, you need to create a menu entry to launch this application graphically.
Your discord.desktop file is still in the /opt/Discord directory. Now you need to move it to /usr/share/applications directory so that your system can access this desktop entry.
For this use the given command –
sudo cp -r /opt/Discord/discord.desktop /usr/share/applications
Now when you open /usr/share/applications/discord.desktop it will display.

Now you should access this application from your menu or activity dashboard.
You can now launch and use the application on your system.
Conclusion
From all of the given methods in my opinion install discord using snap is the easiest one. It also makes applications update easily.
Now if you have any query then write us in the comments below.