The Flameshot is an open-source screenshot tool for Linux and other Unix-like operating systems. You may already have a screenshot tool on your system that comes default with distribution but taking a screenshot using Flameshot is quick and easy.
In this article, I will show you how to install and configure Flameshot on Linux.
The features of Flameshot
The Flameshot tool has the following key features –
- It is fast you can quickly take a screenshot.
- Edit image instantly.
- You can customize its appearance.
- Supports GUI and CLI modes.
- Easy to use.
- In-app screenshot edition.
- It has a DBus interface.
- You can easily upload a screenshot to Imgur.
Prerequisites
To follow this guide you should have –
- The recent version of a Linux distribution should be installed on your system.
- You should have access to a user account with sudo privileges.
How to install Flameshot in Linux
Based on the distribution that you are using, you run one of the given commands to install Flameshot on your system.
In Debian/ Ubuntu/Linux Mint use –
sudo apt install flameshot -y
OR you can install a snap version of Flameshot by using the given command –
sudo snap install flameshotIf Snapd is not enabled on your system then use the given command to install it –
sudo apt install snapd -yIn RHEL/CentOS/Fedora use –
Use the given command to install Flmaeshot in an rpm-based system.
sudo dnf install flameshot -y
In Arch Linux/Manjaro use –
You can use the given command to install Flameshot in Arch Linux or Manjaro.
sudo pacman -S flameshot
Press y and then enter if it asks for confirmation.
Verify the installation of Flameshot
You can verify the installation of flameshot by checking its version.
flameshot -v
This should display output like given in the image below.

How to use Flameshot in Linux
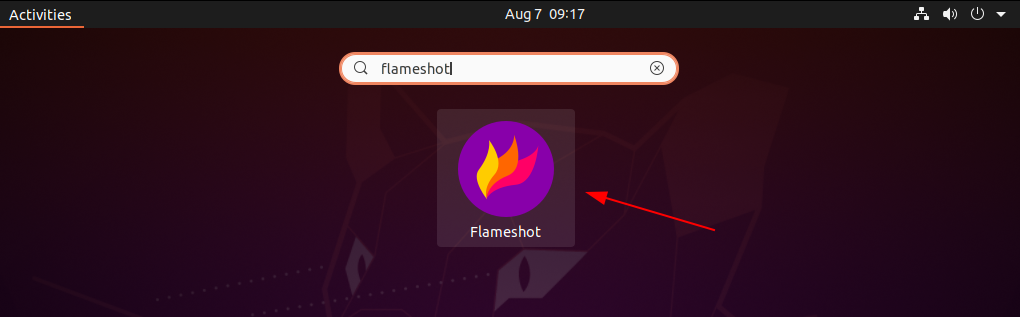
You can use Flameshot in two modes GUI and CLI. In your Linux desktop in the Start menu search for Flameshot when an icon appears click on it to start using flameshot in graphical mode.
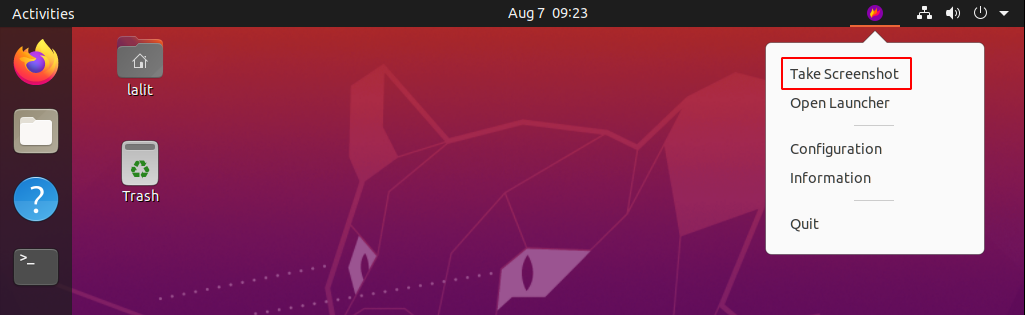
This will launch the application in the system tray you can see this in the given image.
![]()
Taking a screenshot
To take a screenshot using flameshot right click on the flameshot icon in the system tray and then click on the Take Screenshot option.
Now select the area and use the tools to edit the image and finally save it by click on the save option which is displayed by Flameshot.
Similarly, you can try other options to edit your screenshot.
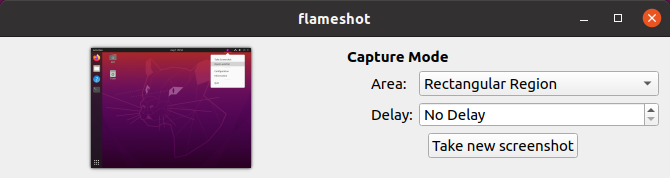
When you click on the next option i.e. Open Launcher it will display the given window where you can select between the area and delay in taking a screenshot.
Configuring Flameshot
You can open the different options for configuring the Flameshot. Click on the Configuration option to launch the configuration window.
By clicking on the third option i.e. Information you can see the about page which includes license, version info, and shortcuts.

Using Flameshot in terminal
To launch flameshot from your terminal execute the given command. This will open the tool in GUI mode to capture a screenshot.
flameshot gui
If you want to store a screenshot in the custom location then use the option -p and pass the location as an argument.
$ flameshot gui -p /home/lalit/Desktop
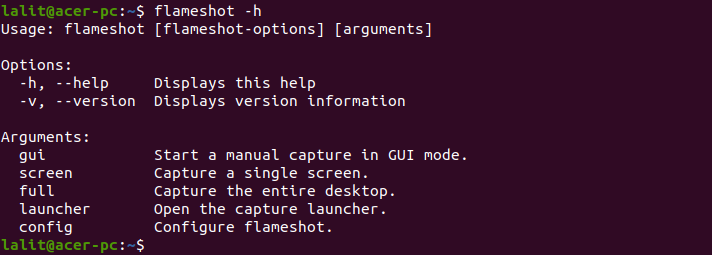
For more information on options that can be used with flameshot in the terminal, use –
flameshot -h
This will display the given output.
Conclusion
Ok, that’s all I hope now you understand how to use the Flameshot tool on your Linux system. If you have a query you can write us in the comments below.