Creating multiple divisions of a physical disk is known as disk partitioning. Each division created is called a partition. Partitions make it easy to organize and share the data on a disk. You can edit and manipulate these partitions for various purposes.
While installing the Linux operating system sometimes you may need to manually create various partitions such as root, home, or swap.
The swap space is used when physical memory or RAM is full. We will see more about this ahead in this article and we will also discuss the steps to resize the swap partition on a Linux system.
What is swap space on Linux?
The swap space or swap area can be a dedicated swap partition, a swap file, or a combination of both.
When the physical memory of a system is full, the operating system moves inactive pages of RAM to the swap space. This is useful for the systems that have a small amount of physical memory.
The swap space should not be considered as the replacement of physical memory. As it is located on the hard disk so it has slower access time than physical memory.
Recommended swap space
The size of swap space is recommended according to the size of the physical memory on that system. What should be the size of the swap partition is better given in Swapfaq.
Steps to resize swap partition
For resizing swap partition you need not boot from a live USB. We will use the Gparted tool for resizing the swap partition. Gparted comes preinstalled in a few distributions but if it is not in your system then use the following command in your terminal to install it –
sudo apt install gparted
After installing GParted follow the steps that are given below –
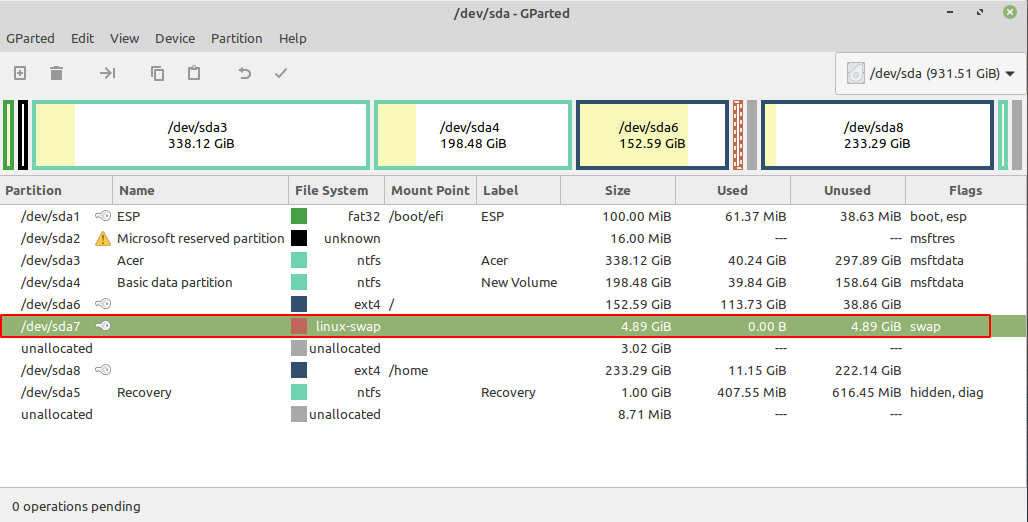
- Launch the GParted tool from the menu on your system and identify the swap partition. As you can see in the image below the highlighted part is the swap partition.

- Right-click on the swap partition this will show a menu, here click on the Swapoff option. Now the swap partition is available for resizing.
- If you want to reduce the size of the partition then select the partition and either click on the resize arrow on the top or right-click and click on the Resize/Move option from the menu. This will open a new window you can resize by entering the new size of this partition or drag the slider given on the top and adjust the size of this partition. And then click on Resize/Move button.

- Currently, you have one operation pending click on the right tick given on the top to apply the changes you made. For increasing the size of the swap partition you should have some unallocated space. You can create unallocated space by shrinking another partition. Here we have around 3 GB of space.
- To increase the size select the swap partition and right-click and then click on Resize/Move options. And then either fill the new size or drag the slider to increase the space of swap partition. Click on Resize/Move once you are done allocating the new size. Finally, click on the right tick given on the top of the GParted interface to apply all the pending operations.

- The size of the swap partition has been increased now, to start using it first select the partition, and then right-click on it and click on the Swapon option. You can now close the GParted application.


Conclusion
There are various command-line tools also available that can be used to resize a partition on Linux. The method given here is the easiest method of resizing swap partition or any other partition on Linux.
Now if you want to say something on this topic then you can write to us in the comments below.